


John Denman handcrafts quality knives with some discarded circular saw blades and a lot of patience
A good knife is something every hunter cherishes. Most of us have more than one ‑ there are skinning knives, gutting knives and boning knives just to name a few.
But from time to time some of us think about making our own. Using a knife that you have created gives you that little extra feeling of independence if you like, an extra contact with the ideal of self-sufficiency. Maybe you just want to do it because you like a bit of tinkering.
It can be a bit daunting when you see the gear turned out by professional knifemakers. The craftsmanship and attention to detail is often amazing. But when it’s all boiled down, what is a knife anyway? It’s a tool. Fine bone handles and intricate blade designs may look great in a display case, but out in the bush, covered in blood and guts does all that count? Not really.
I began making knives a while back and realised I was never going to construct anything fancy. Nor was I going to start from scratch with a forge and some of the other things that the really top knifemakers use. The most important part of any knife is the blade, and I’ve always been partial to blades made from carbon steel. Yes it rusts, but looking after your gear is part and parcel of what we do, so I don’t believe that stainless steel is completely necessary. In fact, often good carbon steel will hold an edge better than most stainless.
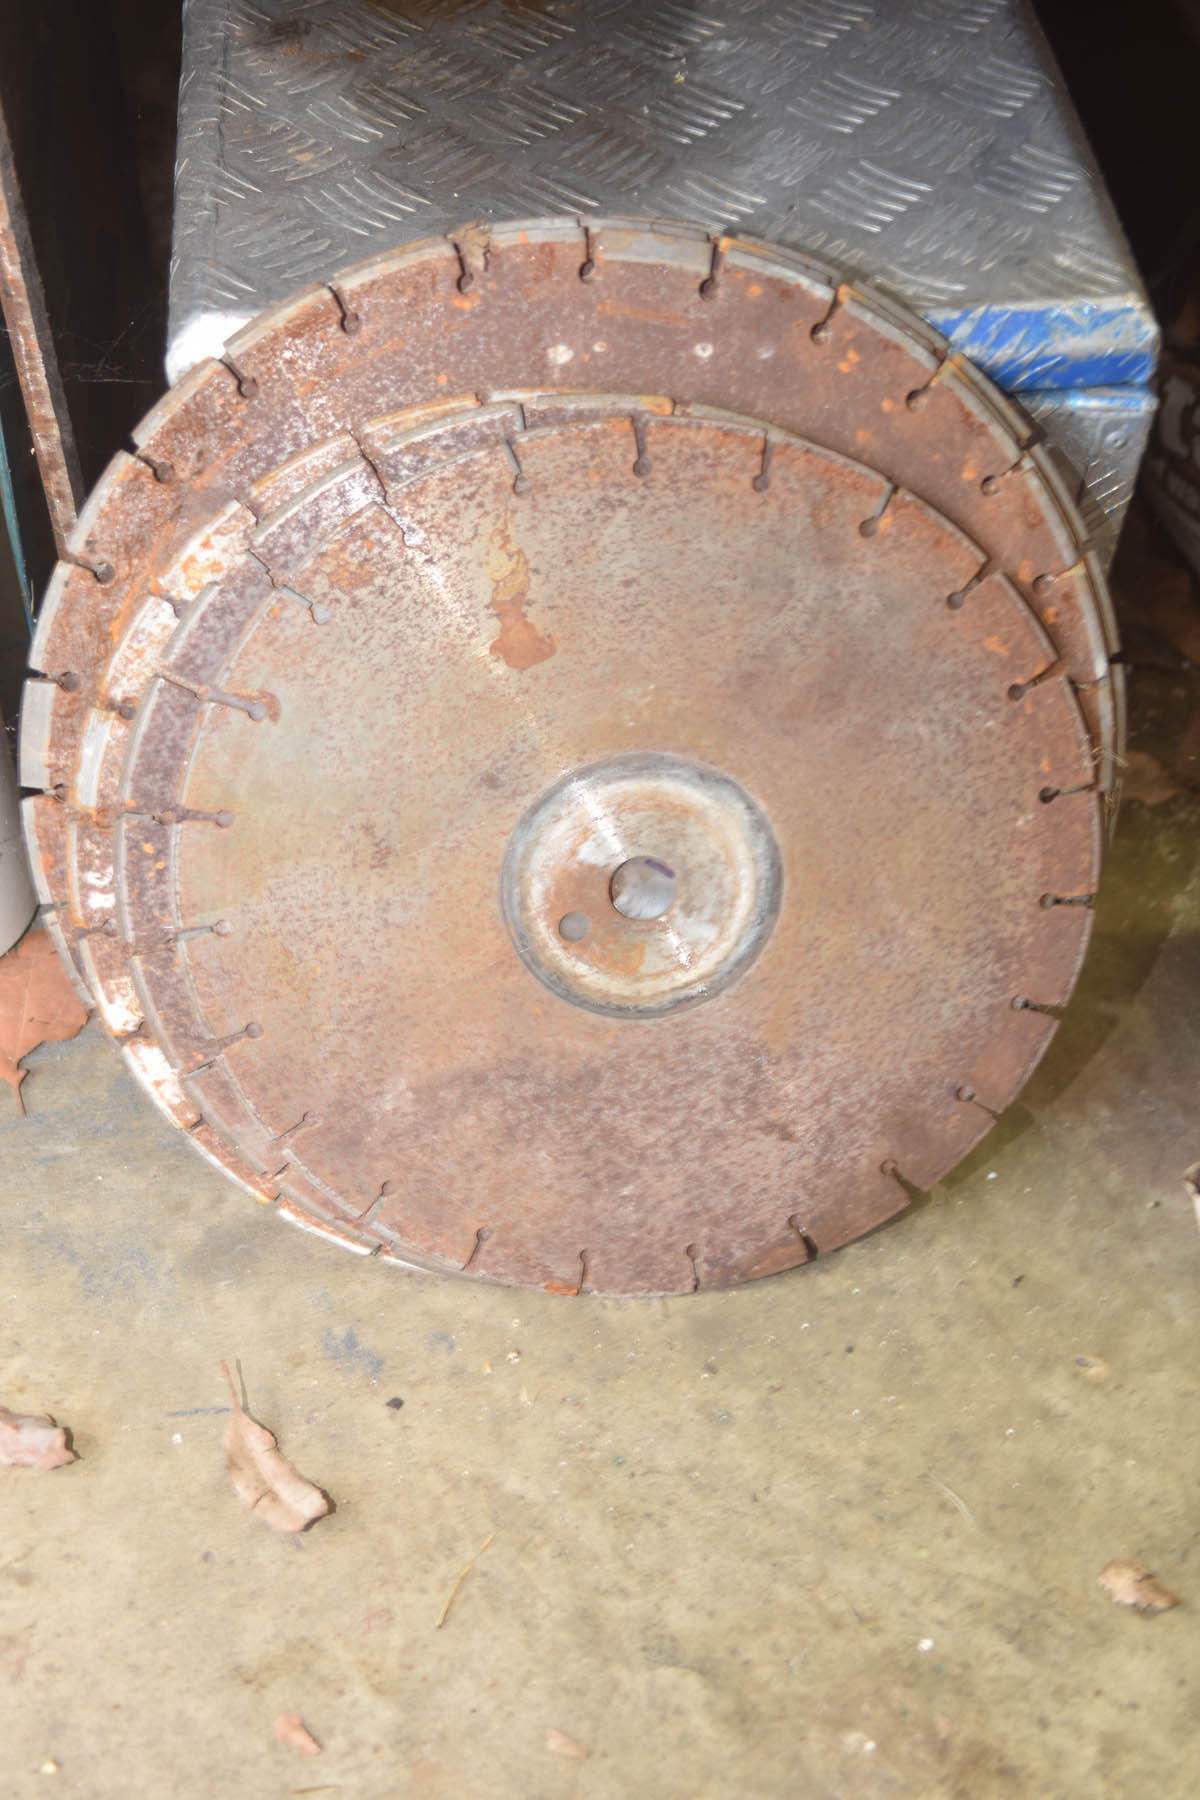
For the blades I seek out old circular saw blades, not always those that come from a sawmill, but the ones used by builders and plumbers, often known as demo saws. ‘Demo’ is short for demolition, and these saws are often used for cutting through concrete. They don’t become sharpened once they lose their edge, they are just discarded. So, you’ll often find old demo saw blades in builders’ or brickies’ yards. Usually, the blokes who used them are happy for you to take them away.
The steel in these blades is pretty hard, so to cut through it you’ll need some good quality cutting discs for your angle grinder. I prefer a cordless grinder for this because there’s no cord to be in the way, or be cut off by accident. I have a number of different shapes I’ve come up with and made templates out of thin plywood.
Then all you have to do is trace the design on the steel with a marking pen and cut around it. This sounds simple, but the steel has to be clamped down on something solid like a bench. Cutting into steel produces sparks, lots of them, and your eyesight is more important than the knife.
Some demo saw blades have holes in them. If you can position your template so those holes line up with where the handle will be, that will save you some drilling later. Cutting out the knife shape can be a bit hard. An angle grinder is not a precision instrument, so don’t be afraid to cut a bit outside the lines you have marked out on the steel.
There is an old saying in woodwork and metal work that you can always cut a bit off but it’s not so easy putting it back on. In other words, you can tidy up with a griding disc after the initial cut is made. Don’t worry about the heat of the grinder changing the temper of the steel either. It has to become a lot hotter to do that. Once you have the outline done, trim off any excess from your cut.
The next step is to put an edge on the blade. This will be more like shaping than sharpening. The design of the knife will dictate the sort of edge you will want. Most hunting knives are better with a flat grind that tapers slowly to the final edge. This is the sort of edge you need for slicing and skinning.
It’s comparatively easy to damage, or ‘notch’ than a more chisel style edge, but then the knife is not designed to hack through bone, and most good hunting knives are ground this way.
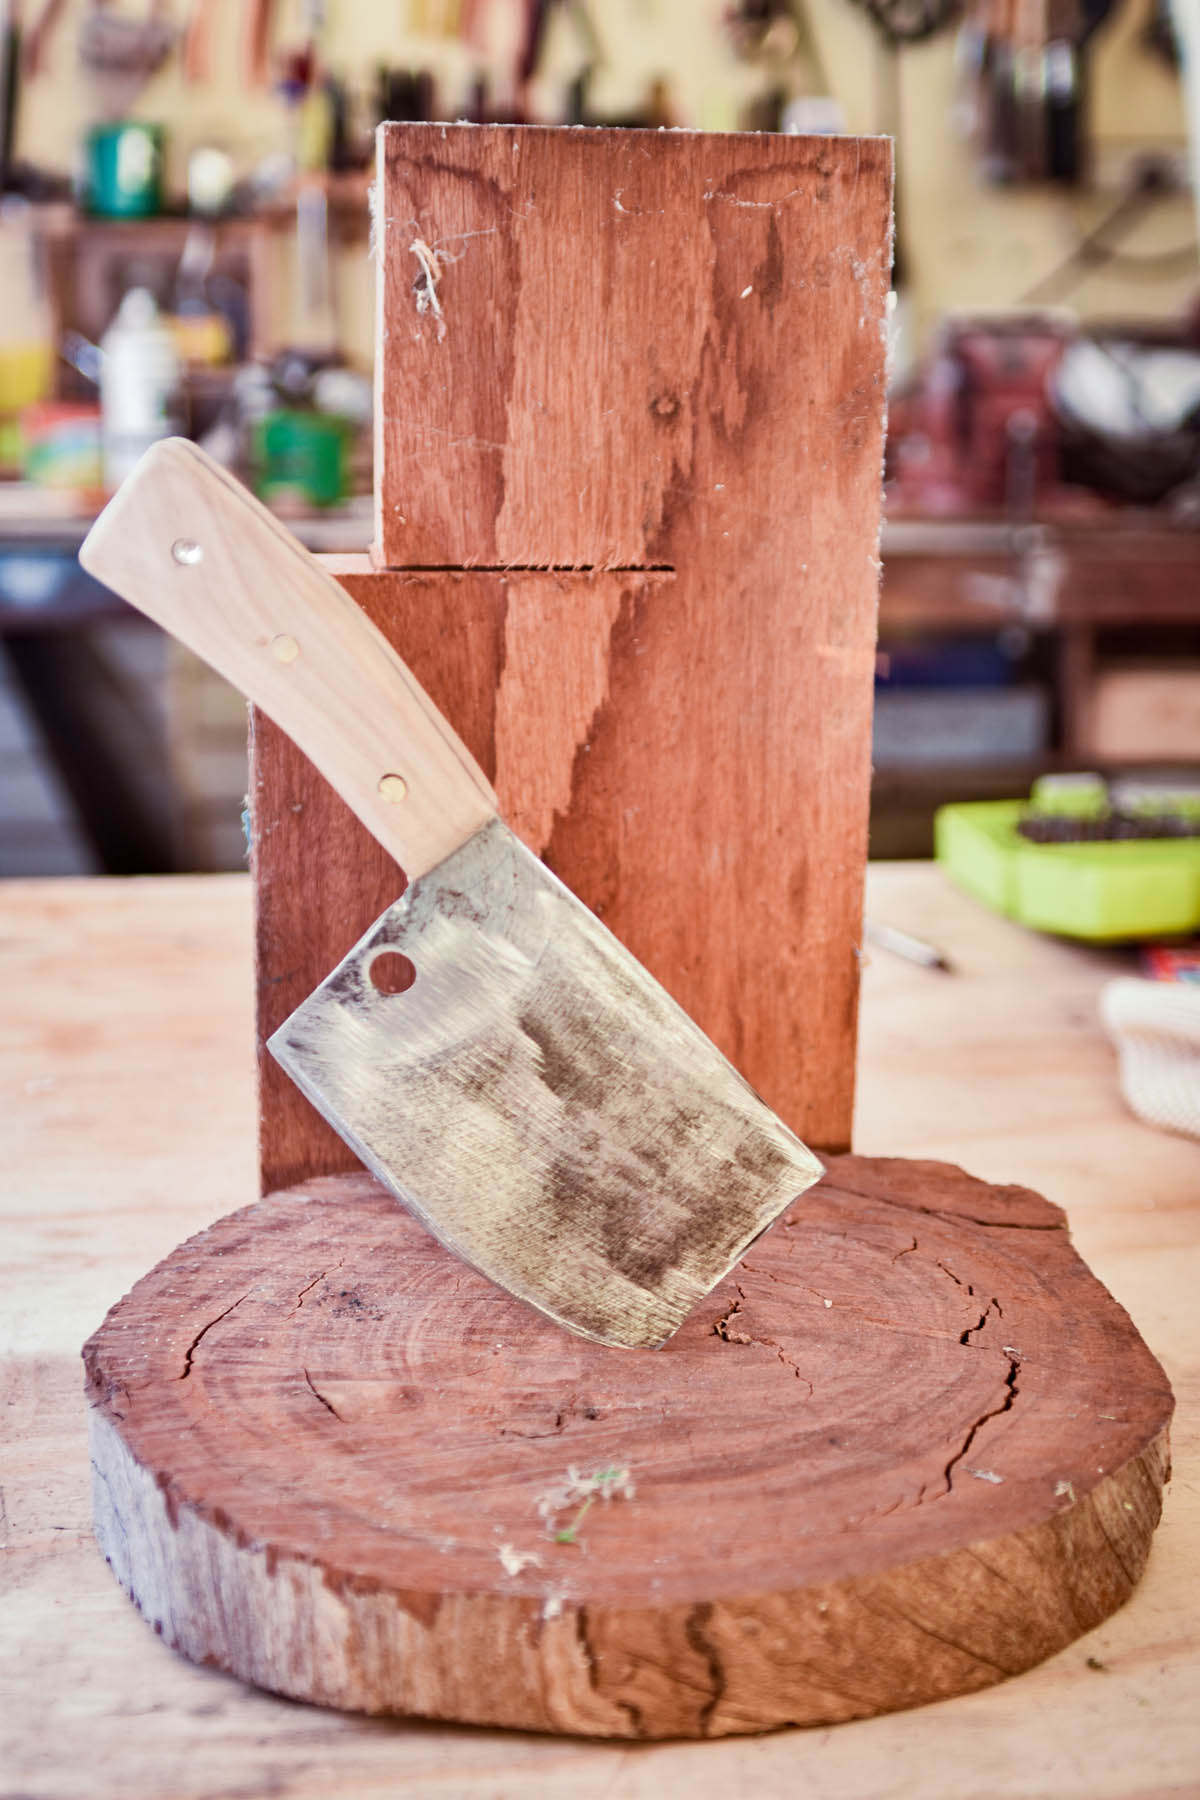
I’m not much of a fan of the Bowie-style knife, particularly when the tip of the blade is pointed up. This shape may be okay for skinning, but certainly not for the belly cut because there’s far too much chance of the point digging into the gut bag.
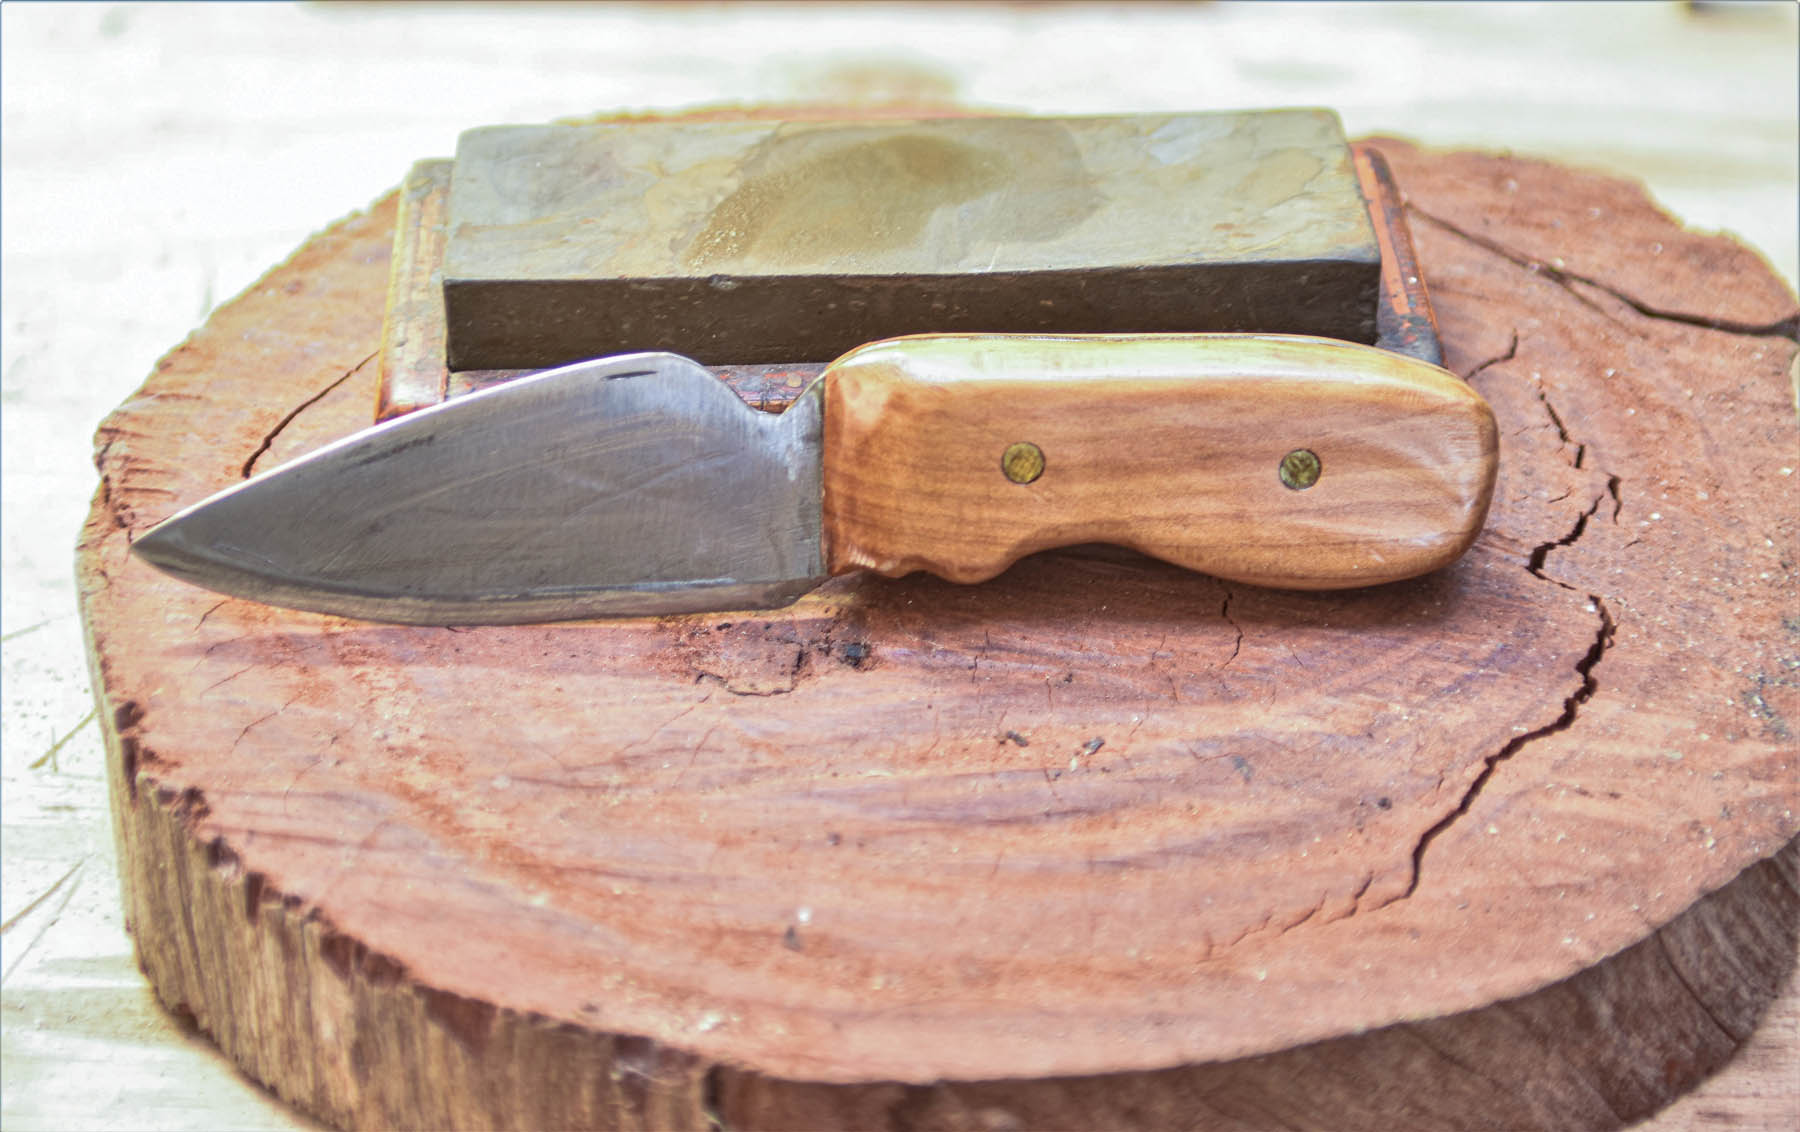
I prefer a ‘drop point’. This style allows you to run the knife up the belly using the flat upper surface of the blade to skim over the gut. Few hunters carry just one knife, but there may be times when the one knife is all you have, and you need to be able to use it for more than a specific task.
There are a few tools you’ll need to make knives. Obviously an angle grinder is one, and you can do a significant amount of work using a 10cm grinder. There is a wide range of attachments for sanding, cleaning up a surface and even a degree of polishing available.
Other tools I’ve found useful are some fine grade files, A Dremel tool, and if you are really keen, a bench grinder that includes a linishing belt. You’ll also need a good electric drill with some metal drill bits.
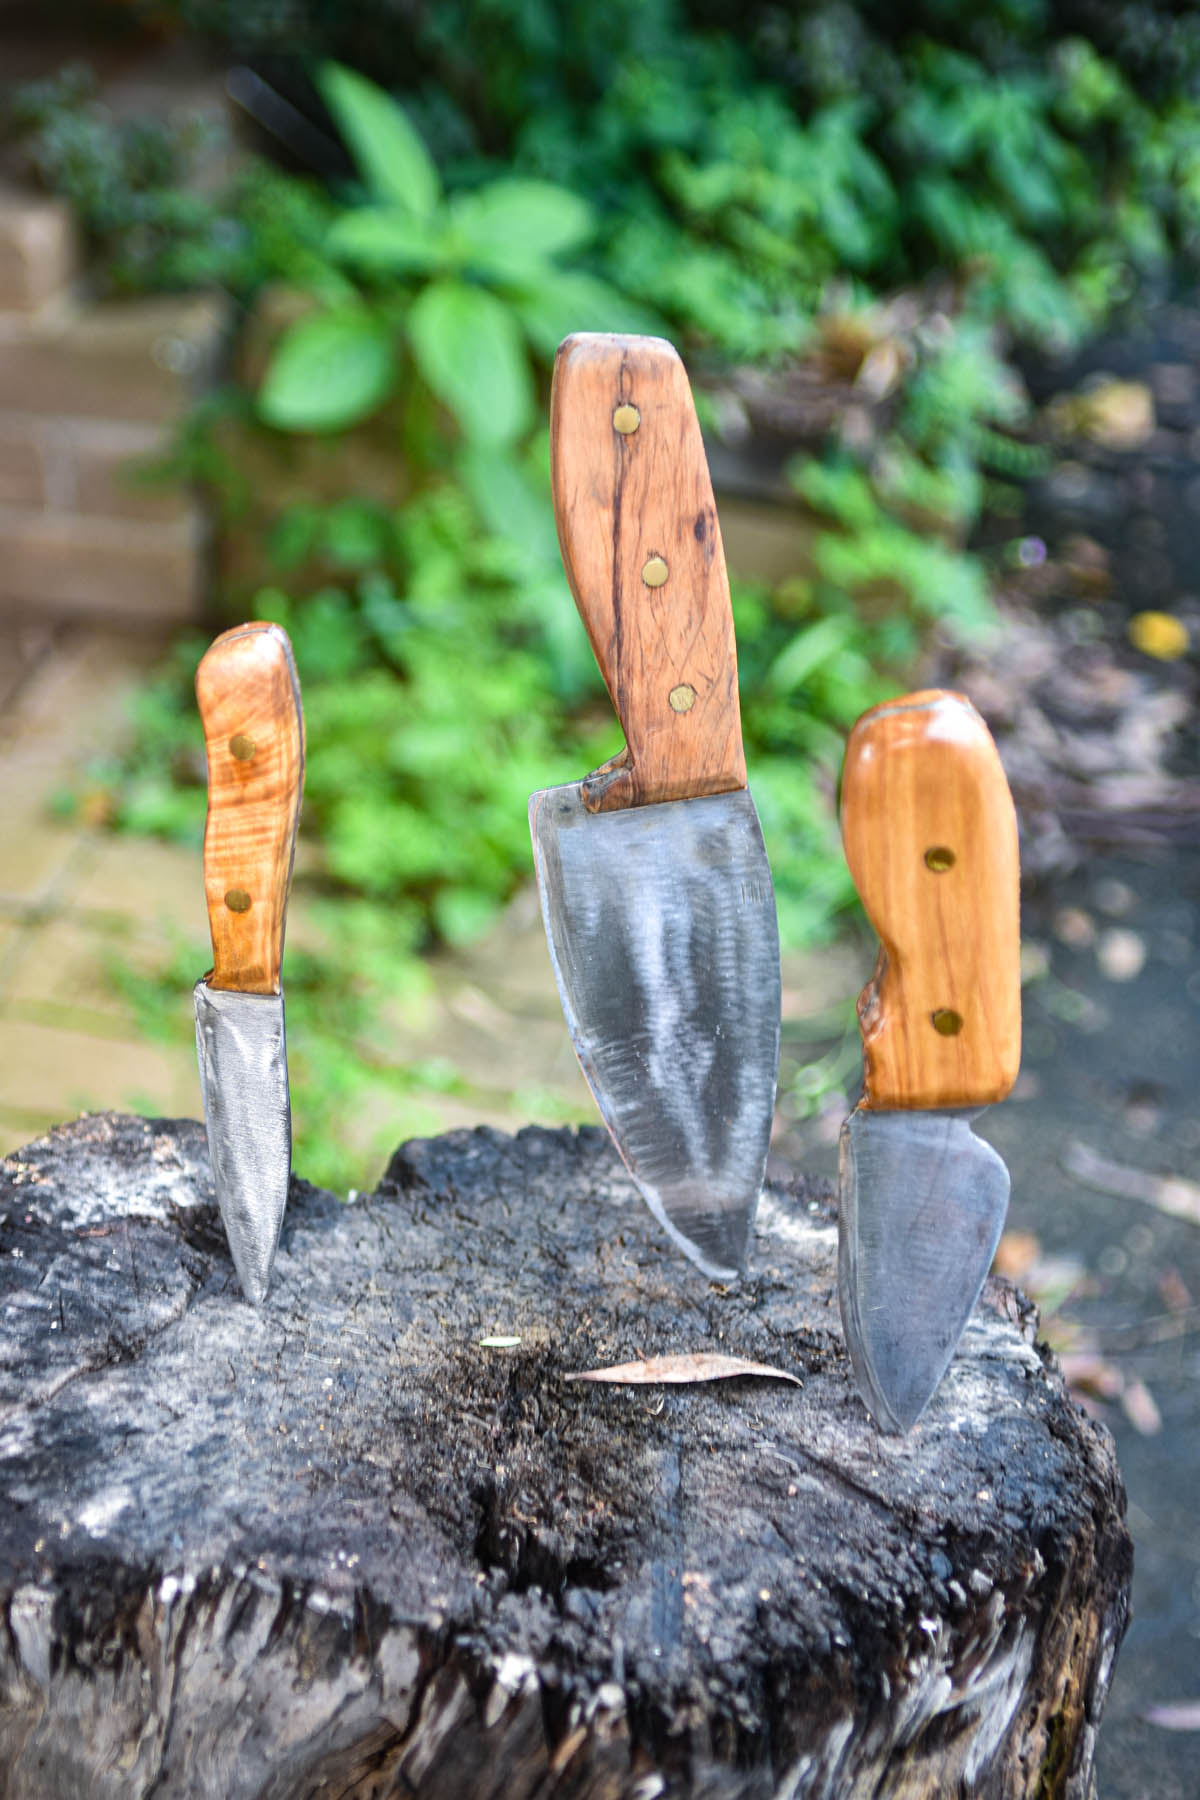
It’s not hard to be a bit impatient to see your finished product, but patience in this sort of work is essential. As you progress as a knifemaker, your skills will improve and you’ll come up with a variety of designs you can work on. We are not talking about a money-making business here, just a hobby that fits in nicely with your hunting passion.
I tend to give away a few of my knives, mainly to friends who hunt, or have an appreciation for something hand-made. There are plenty of knifemakers around, many of them professional, so I doubt that most who are reading this will be wanting to see their fortune in knifemaking.
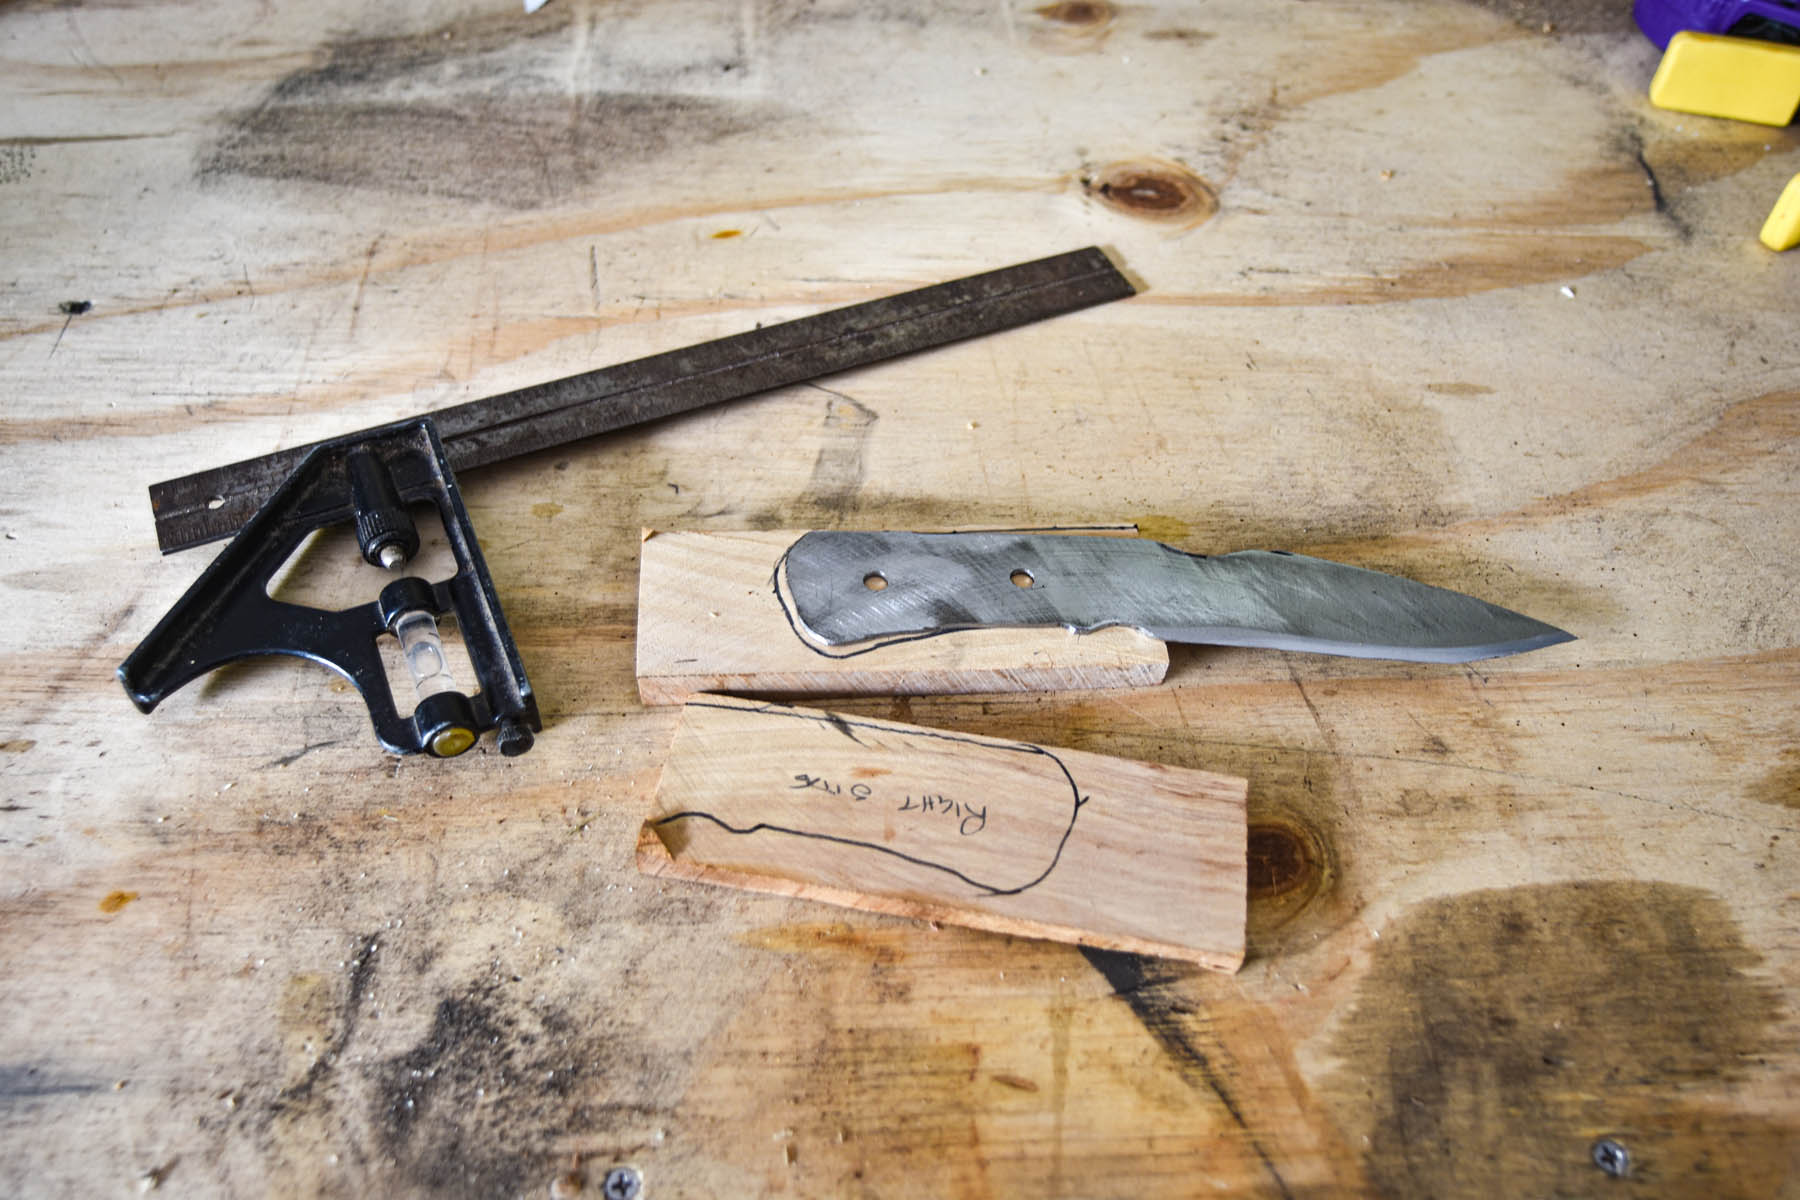
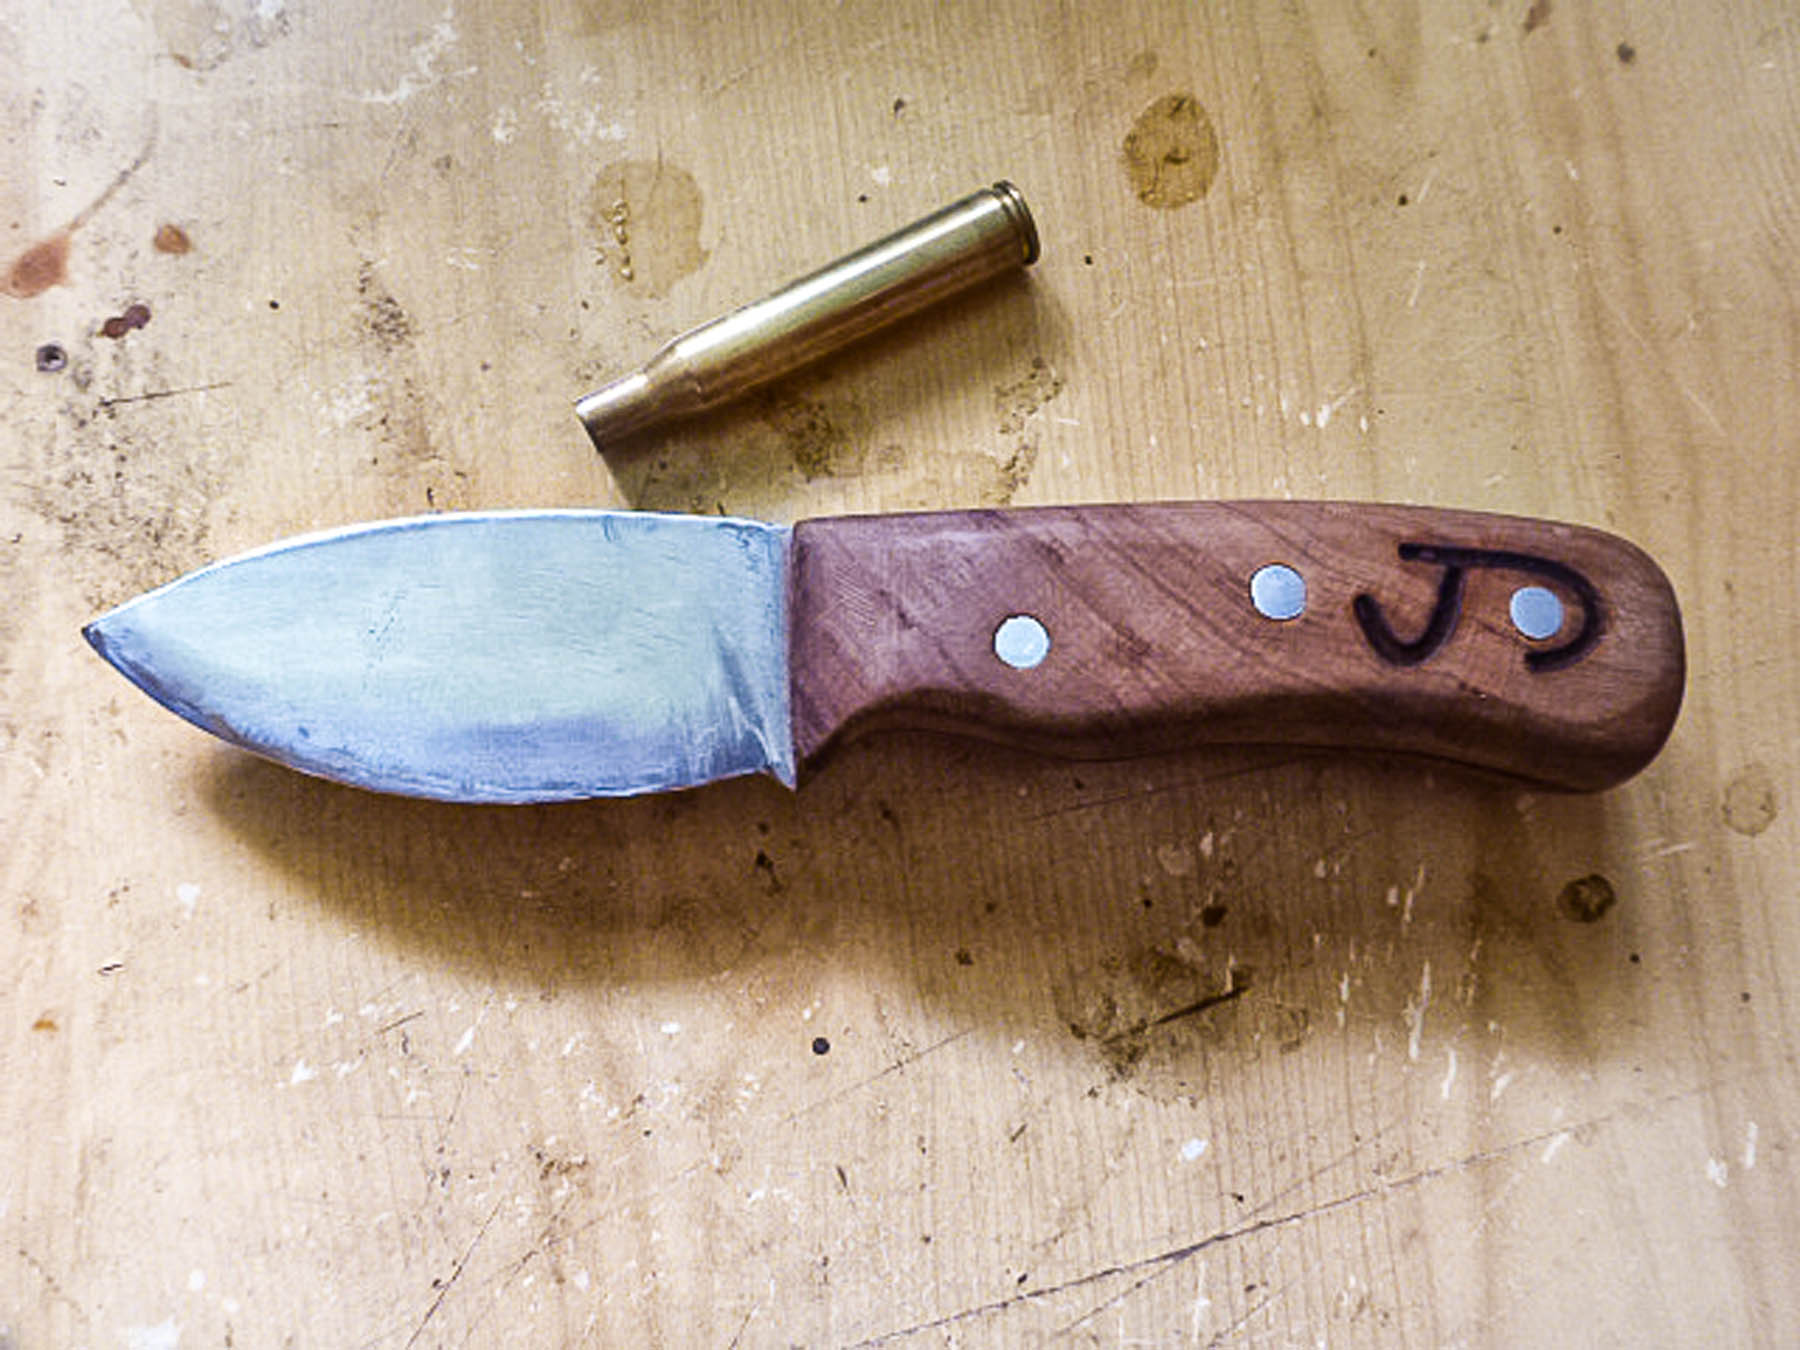
Make sure that the blade has been cleaned up as much as possible and the edge is close to finished before you are started on the handle, or scales. It’s also time to drill a couple of holes in the tang if no suitable ones were already there. I use a 6.5mm metal drill for this and always make a smaller pilot hole beforehand.
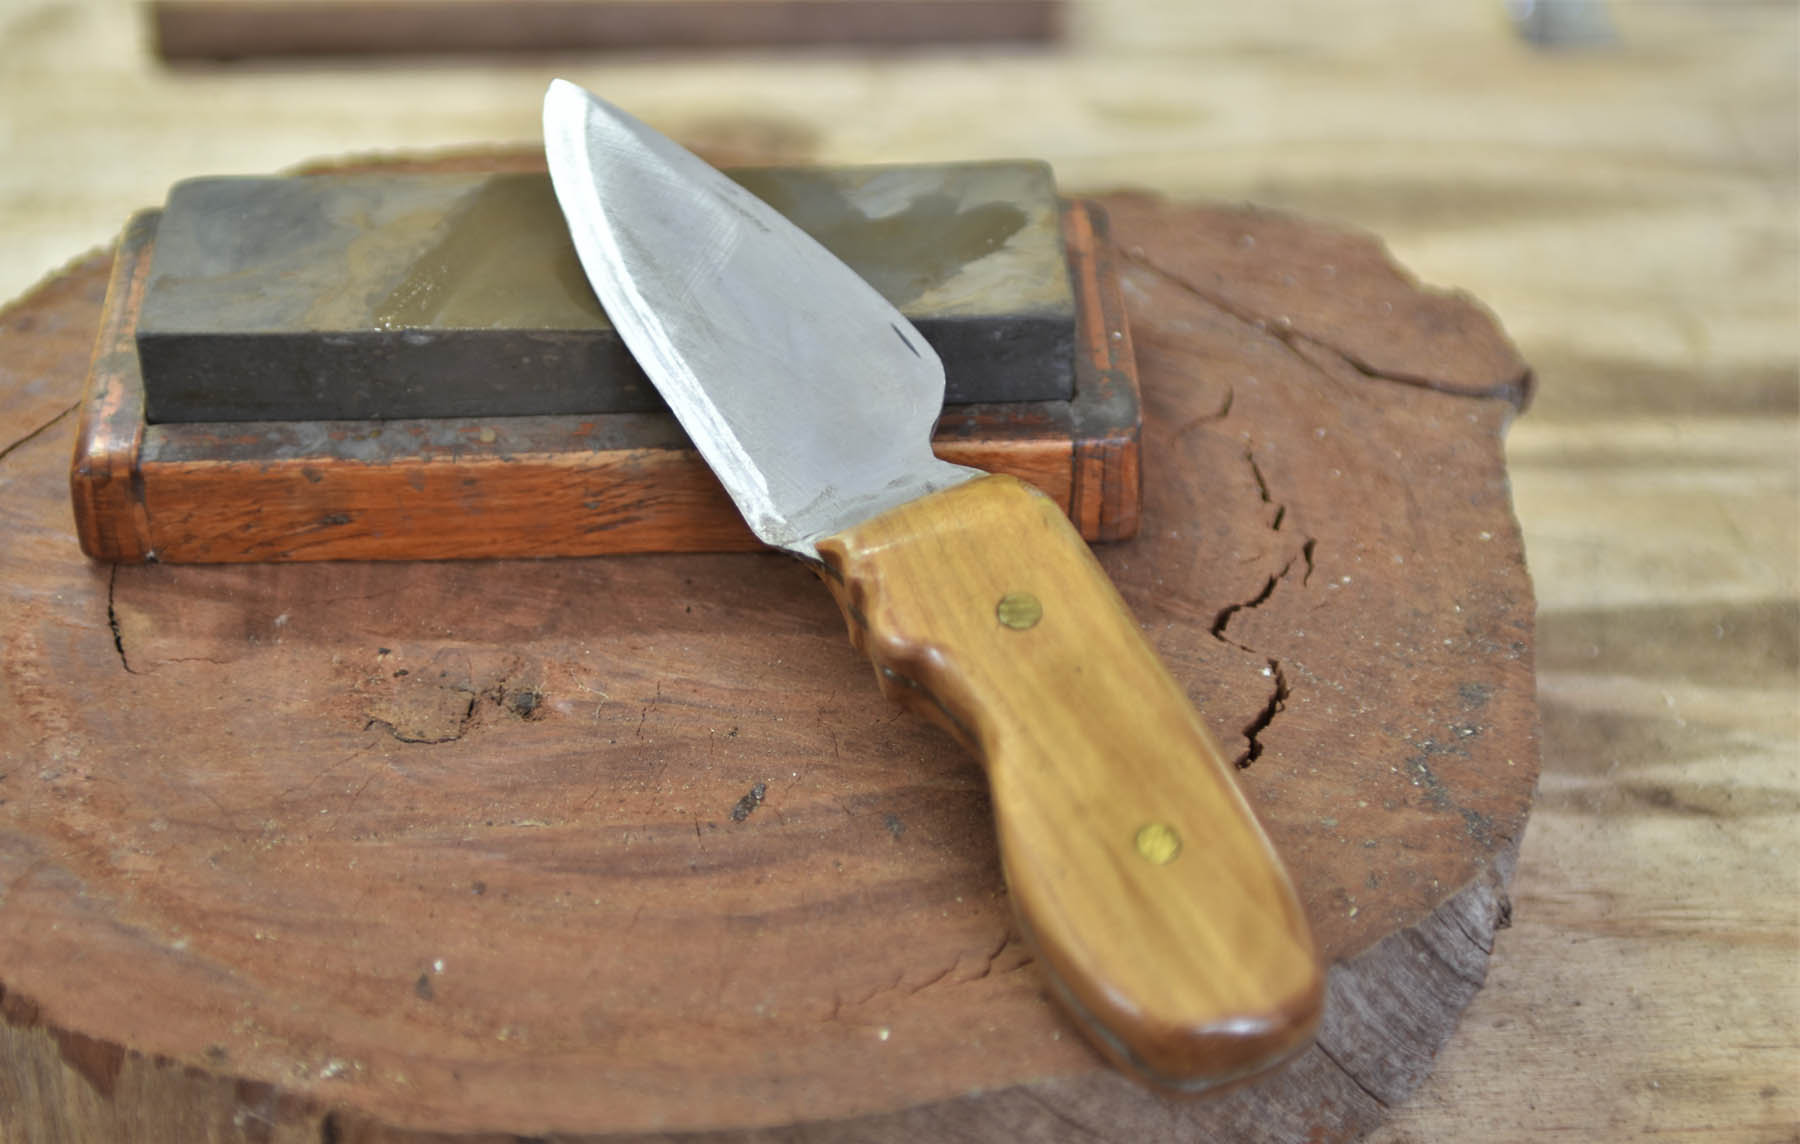
Final work on the edge should be done using a sharpening stone. Knife handles are traditionally made of wood, and we are blessed in this country with some excellent hardwood for the job. I specify hardwood because it’s mostly close grained, and this is important for the finished product. Although I’ve also found that camphor laurel can be good and often has a fine grain.
You can obtain your knife handle wood from all sorts of places. I’ve been known to raid the firewood stack from time to time, and found iron bark is excellent wood for scales. The problem sometimes is to find old wood that hasn’t too many cracks in it. Sometimes the rough outer part of the wood can be used to leave a bit of texture, and old weathered wood can have some interesting features on it, or ‘character’.
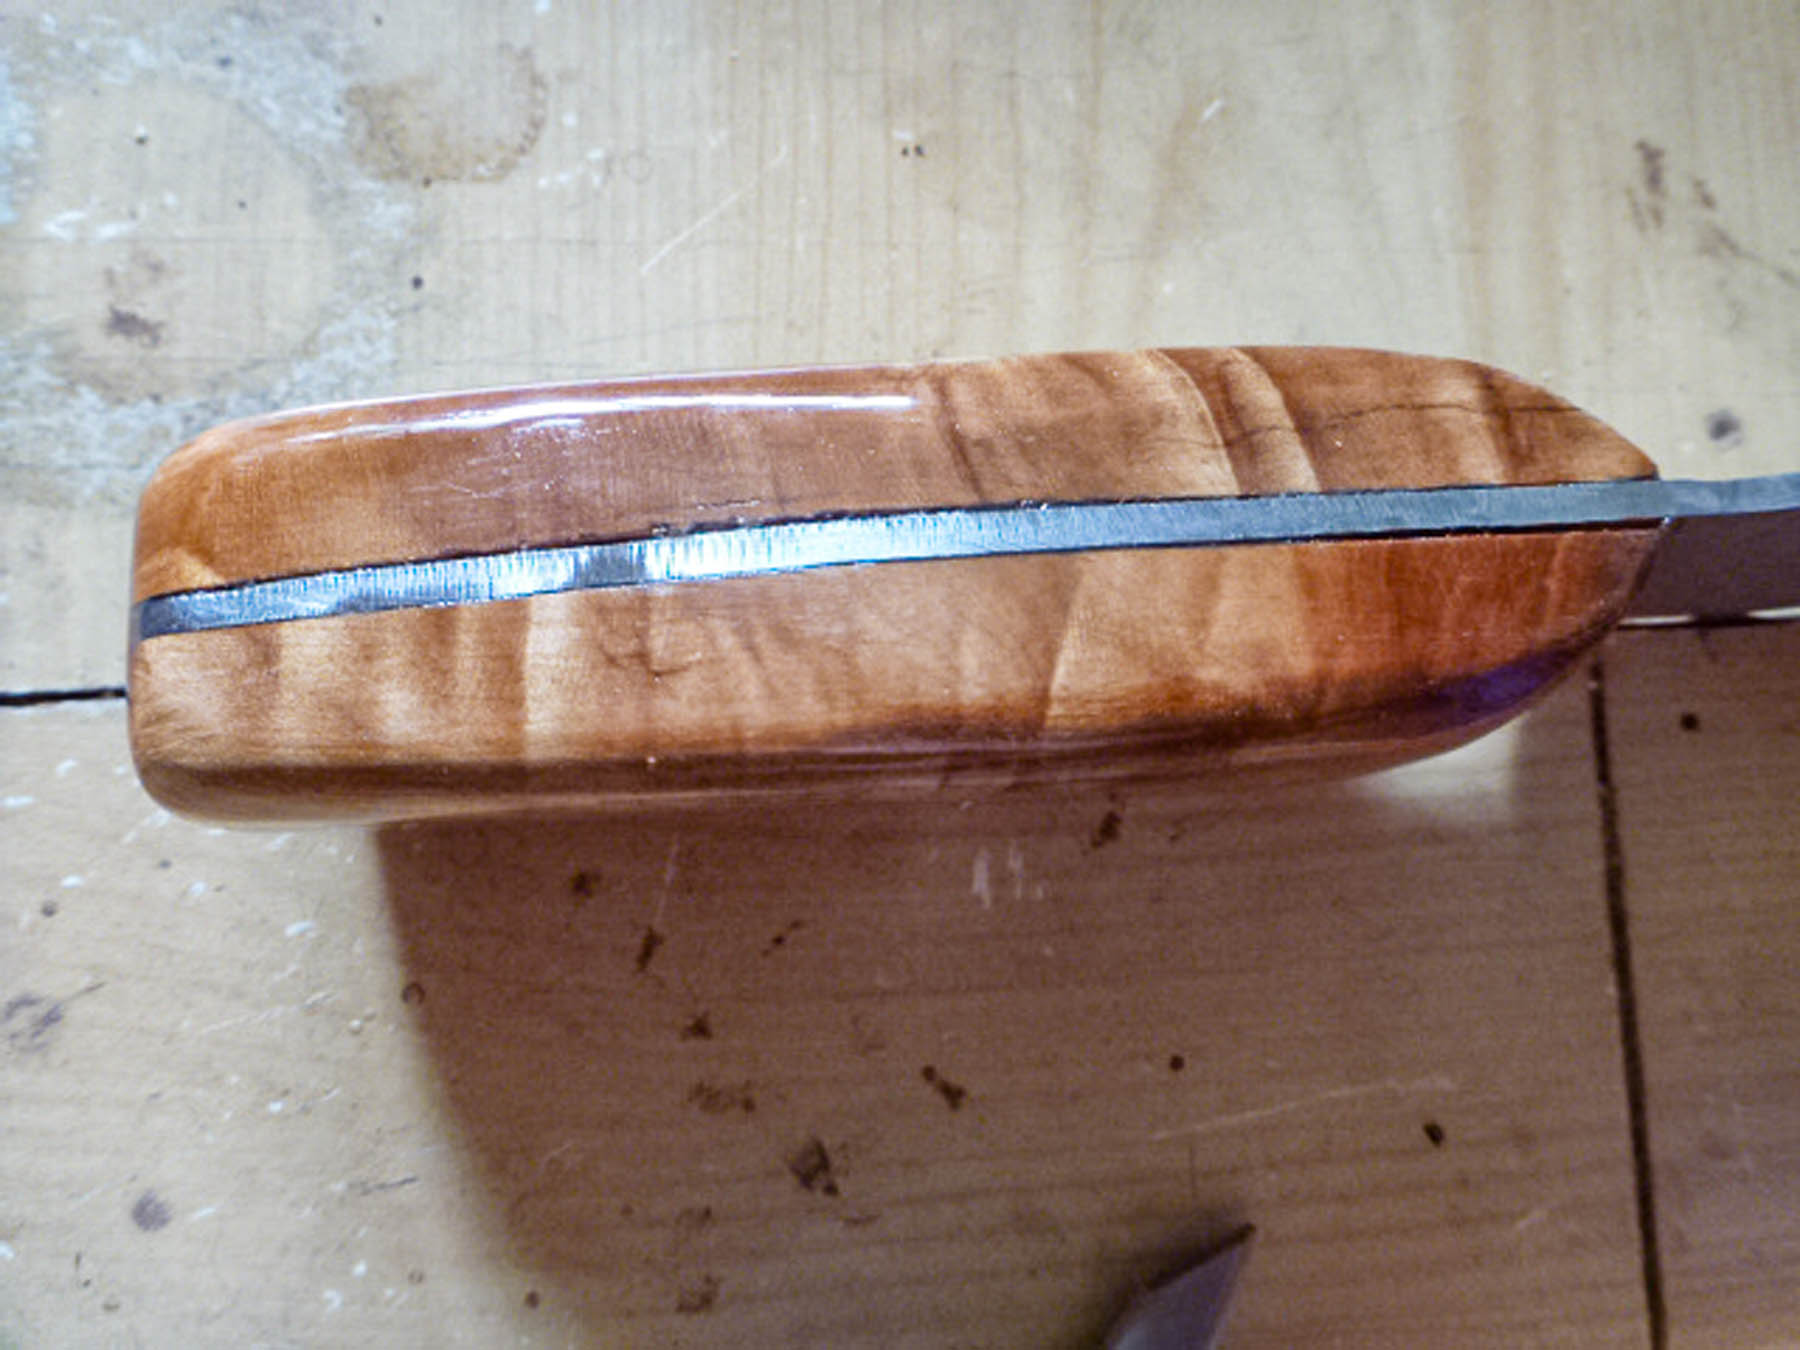
Cut your wood along the grain, because if you slice across the grain the wood is likely to snap off during cutting or shaping. I use a drop saw to cut down the length and find it leaves a clean finish. This is the side of the wood that goes up against the tang, so you don’t want any gaps between steel and wood.
Once you’ve cut the wood for the scales, the knife tang can be laid on the wood and the outline traced on it. Remember to mark each one as left or right side, because they are not usually interchangeable. I cut the outline out by hand using a coping saw. If you have access to a bench jigsaw, that may be easier, but never forget that this is being done as a hobby, and speed is definitely not of the essence.
There’s no need to do any final shaping at this point, just have the first side of the handle fitted to the tang. The easiest way to do this is find yourself some Araldite 5 Minute epoxy. This stuff is amazingly strong, so make sure you have it placed correctly because once it dries nothing will shift it. Even though the epoxy will hold the scales on, I like to put a couple of rivets through the handle. I use 6.5mm brass rod for this.
Once you’re happy that the first side of the handle is well secured, you can drill the holes for the rivets. Then you can epoxy the other side and drill all the way through when that’s set. Fitting the rivets and drilling the holes should always be done before any final shaping of the scales.
The initial shaping can be done using your angle grinder again, but with a sanding disc fitted. The rivets receive a dose of epoxy too to hold them in place, then final shaping is done. You don’t want any gaps between wood and metal, because that’s where some stray matter can lodge. The whole surface of the handles, once sanded smooth, obtains at least two coats of marine grade polyurethane.
The final sharpening should be with a quality stone. While there are plenty of ‘easy’ sharpening tools on the market, for someone wanting to become a knifemaker, the ability to use a stone should be learnt. Finally, bear in mind that the steel you are using is carbon steel and will rust if it’s not protected. I use a product called Renaissance Wax. It will fill the tiny pores of metal leather and timber and safeguard the surface.