

Mike Smith
Zeroing a rifle is the process of adjusting the sights so the projectile strikes the target as close as possible to the point of aim. It’s a basic job which most shooters do, or at least check, on a regular basis though it’s not uncommon to see someone expending large amounts of ammunition – and generating a lot of frustration – during the procedure, especially when a new rifle/scope combination is being zeroed. This article explains a step-by-step process which typically can have a new rifle zeroed at two different distances using just four rounds of ammunition.
Preparation
Assuming you already have the scope correctly mounted on the rifle, you need two sheets of card – I use the back of old SSAA 25/50m 3P rimfire targets – and some of the ammunition for which you want to obtain zero.
If you intend to zero at two distances – say for example 100m and 200m – you’ll need to know the ballistic characteristics of the ammunition, specifically the distance which the projectile will drop vertically between the distances. A few round target patches about 20mm in diameter make life easier though a black heavy felt tip pen will assist.
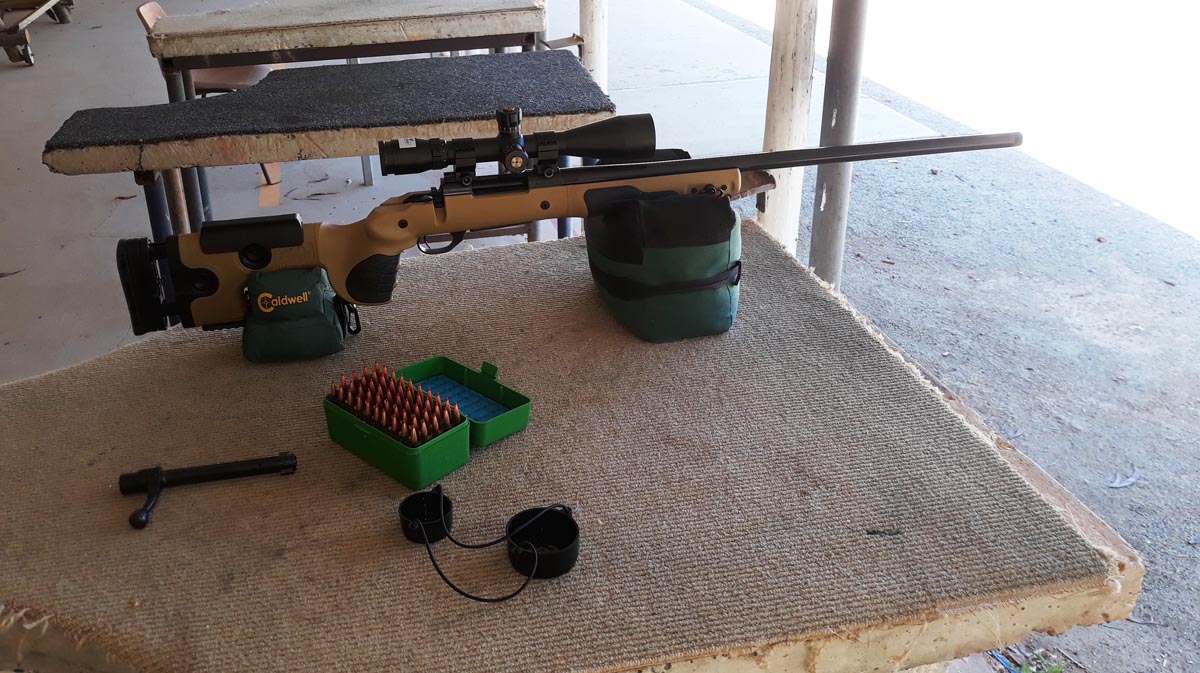
You’ll need access to a suitable shooting range which has bench rests and some type of front and rear rifle supports, solid rests or sandbags. If there are no benches the exercise can be done from the prone position. Finally, it can be helpful if you have some idea of what sort of precision or group size you expect the rifle to achieve.
Step 1
Stick one of your target patches in the centre of a piece of card and fix it to a target board at a distance of 25m. This is where a lot of folk go wrong as I’ve seen shooters start the zeroing process at 50m or more and have watched someone attempt an initial zero with a $10,000 F Class at 300m. It didn’t go well.
At 25m you can be almost certain to be on the cardboard with the first shot. Failing to do that usually results in lots of irritation as the scope adjustment or point of aim is wound up and down, left and right while trying to see if the projectile is missing high or low and/or left or right.
Step 2
The next move is to bore sight the rifle/scope combination. There are an array of gadgets, usually using a laser, which can be employed but they’re not essential. Firstly check the scope’s Adjustable Objective (AO) or side focus, if it has one, is set for the correct distance ie, 25m as this will reduce any parallax errors. Also remove any covers on the scope adjustment turrets.
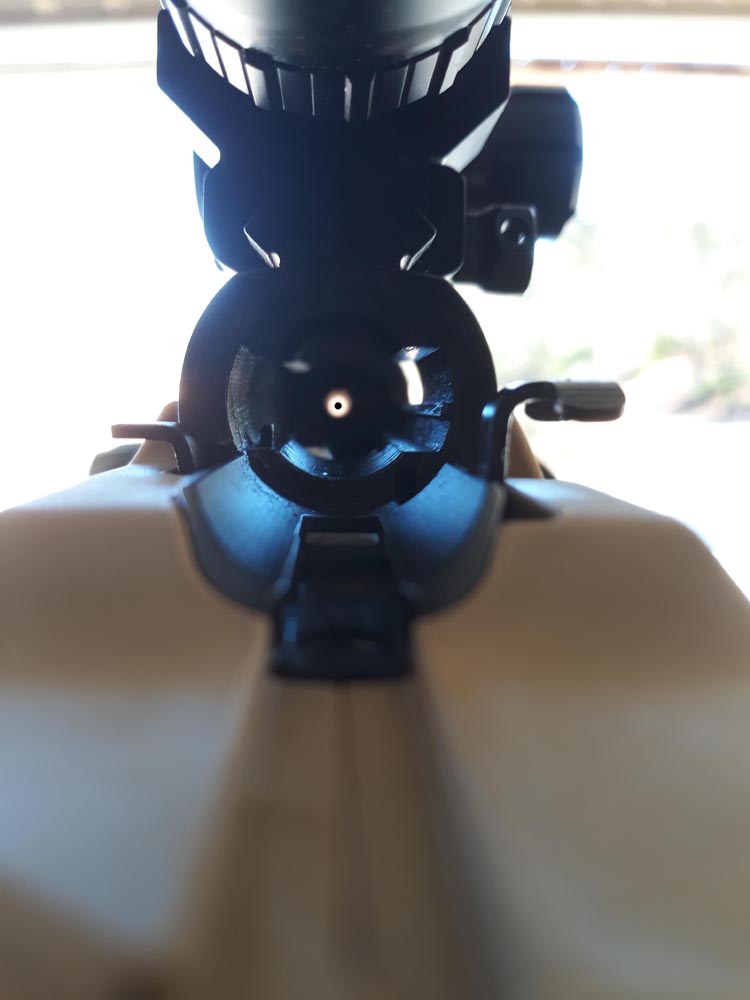
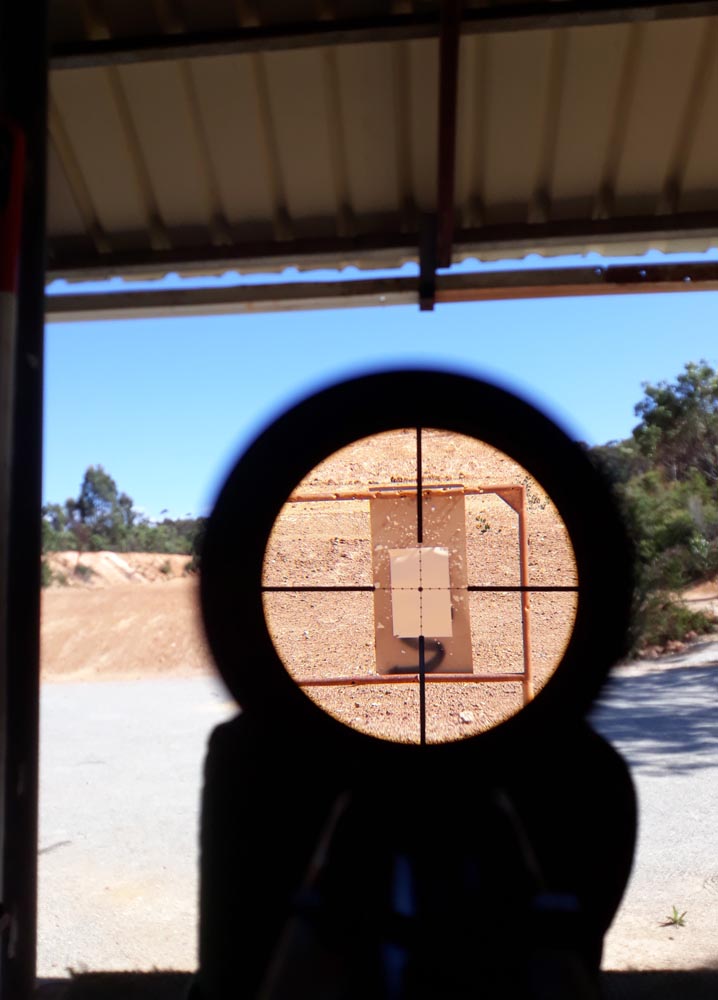
Set up the rifle on the rest with bolt removed and firearm pointing at the target. Look through the action, down the barrel and alter the position of the rifle until you can see the black target patch right in the centre of the bore. This may sound tricky but it’s usually not difficult.
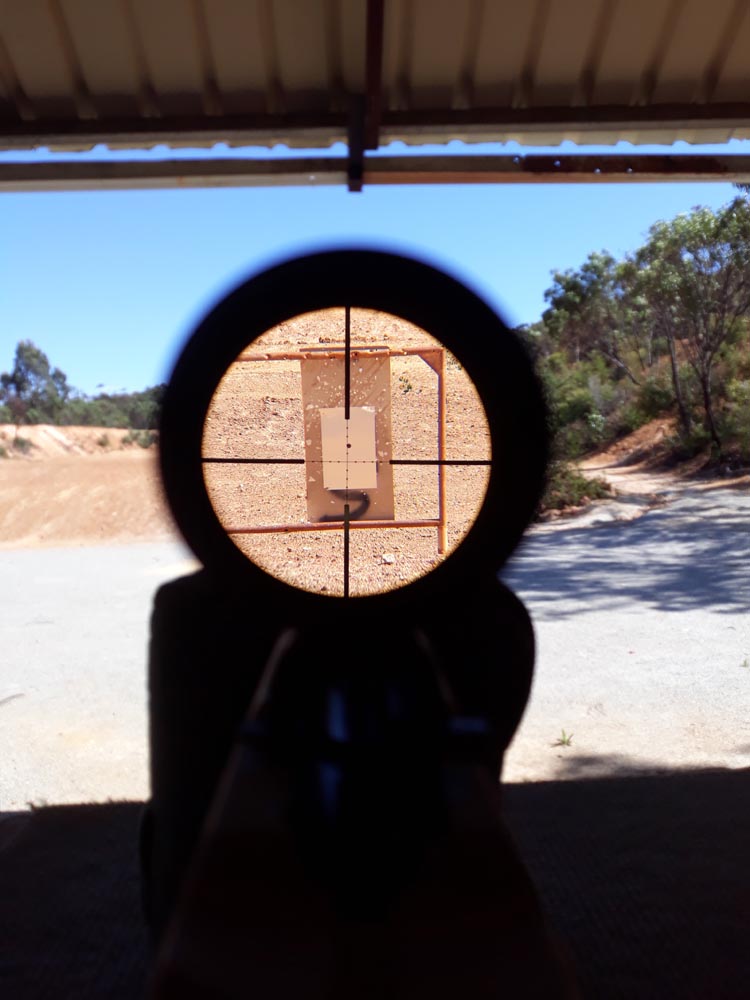
Once you have a good picture try not to disturb the rifle’s position – your rest has to be able to keep the rifle stable without you holding it. Look through the scope, being careful not to move the rifle, and you should see the target card with the reticle situated some distance away from the patch. In my case the zero was being checked after mounting a 6.5 Creedmoor barreled action into a new stock so the initial zero wasn’t far off.
Without moving the rifle, tweak the elevation up/down and windage left/right on the scope until the reticle is centred on the target patch. Note that with most modern scopes modifying the turrets actually moves the image while the reticle remains centred.
You may find the scope settings need to be moved in the opposite direction to what you assume. If the reticle is for example above the target patch, the scope will need to be adjusted “Up” to correct the error, similarly if the reticle is to the right, the scope must be changed to “Right”.
In my cased the reticle was low and slightly left of the patch so I had to amend the scope “Down” and “Left” to put the reticle over the patch. If you do accidently move the rifle while doing this, go back and check you still have the correct view, through the barrel.
Step 3
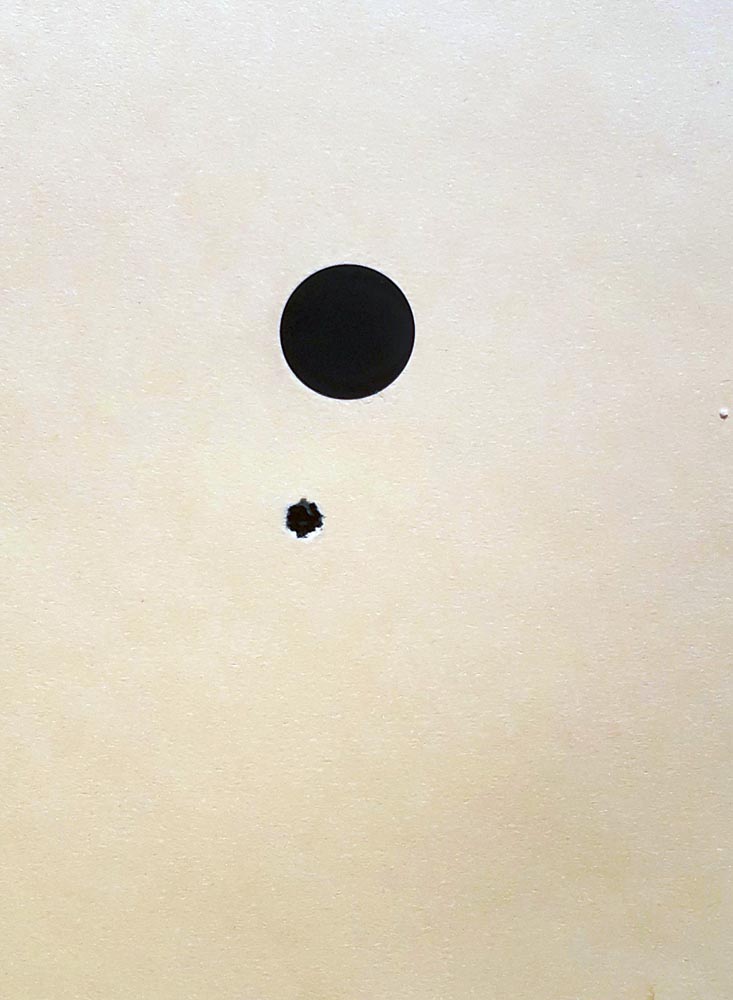
Now you’re actually able to shoot. Taking all the normal safety precautions, replace the bolt in the rifle and load and fire a round while carefully aiming at the target patch. If you’ve been methodical in Step 2 you should find the projectile has struck the cardboard close to the patch (in my experience it’s not unusual to actually hit it). In this example the result was about 30mm low and a touch left, close enough as we’re on the cardboard with one shot.
If the projectile has struck more than 50mm from the patch then something isn’t right and needs to be fixed. Going back a step and checking the bore sighting would be the first thing to do.
Step 4
We’re going to move to a more normal distance for the calibre of rifle being zeroed. For a low velocity calibre such as a 22LR, 50m is probably appropriate and for a higher velocity calibre 100m would be the standard next stage.
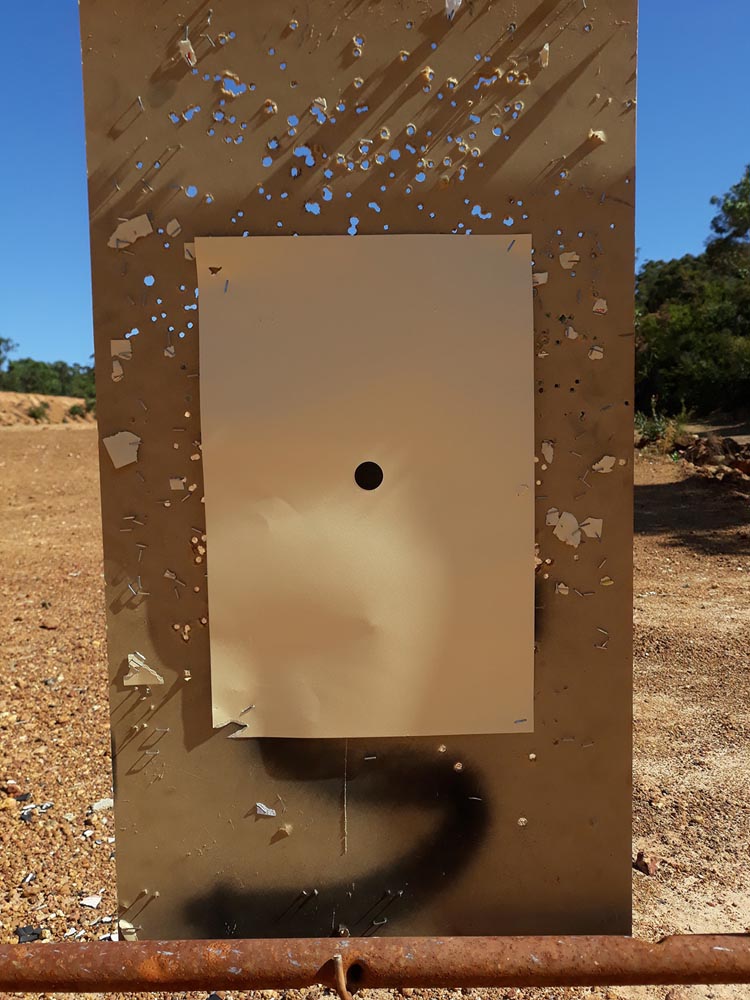
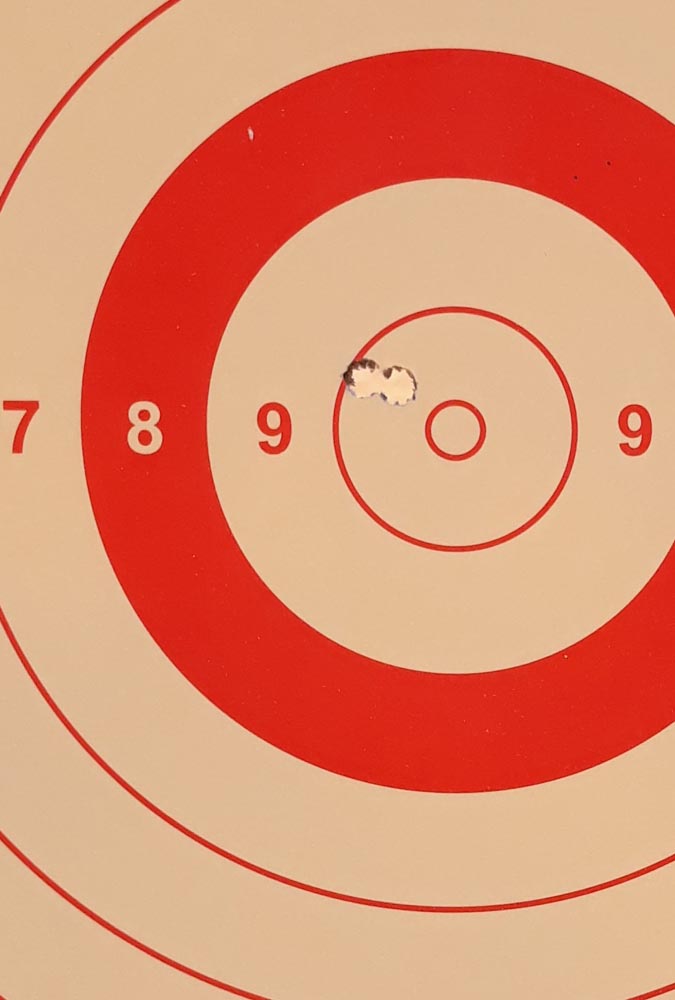
It was convenient for me to use a standard SSAA 100m CF target. Again, taking all your safety precautions and after adjusting any scope parallax settings to the new distance, load and fire a round while aiming at the mark on your target.
If all is well the projectile will have hit the target and its point of impact is clear (my first round at this distance was close to the point of aim, just inside the 10 ring). I should say this accuracy is higher than I might typically expect at this stage which is due to the fact that, based on previous experience with this rifle, I’d already wound in 6 Minutes of Arc (MOA) of “Up” elevation from the setting used at 25m.
Step 5
We need to fiddle with the scope to correct whatever zeroing error exists at this distance and there are several ways of doing this, none without their pitfalls.
A: Estimate the distance between the point of aim and point of impact and adjust the scope elevation and windage to correct the error. This involves making the estimate in millimetres and converting that to MOA before modifying the scope. This conversion might be challenging. In addition the turret calibration of your scope may not be accurate as ,for example, dialling in 1 MOA might not accurately move the image exactly 1 MOA. Also, sometimes fine-tuning a scope’s elevation setting can have an effect on the windage and vice versa.
B: You can make a guess at the new settings and wind them in to your scope, take another shot and move on. You’ll get there in the end but it could be frustrating.
C: Aim the rifle so the reticle is again over the mark. Carefully, without moving the rifle, adjust the scope settings until the reticle is over the place where the projectile struck the target. As before, you’ll find you need to move the settings in the opposite direction to what you might think and while this can be tricky, when done well it should see you close to a good zero with one more shot.
Step 6
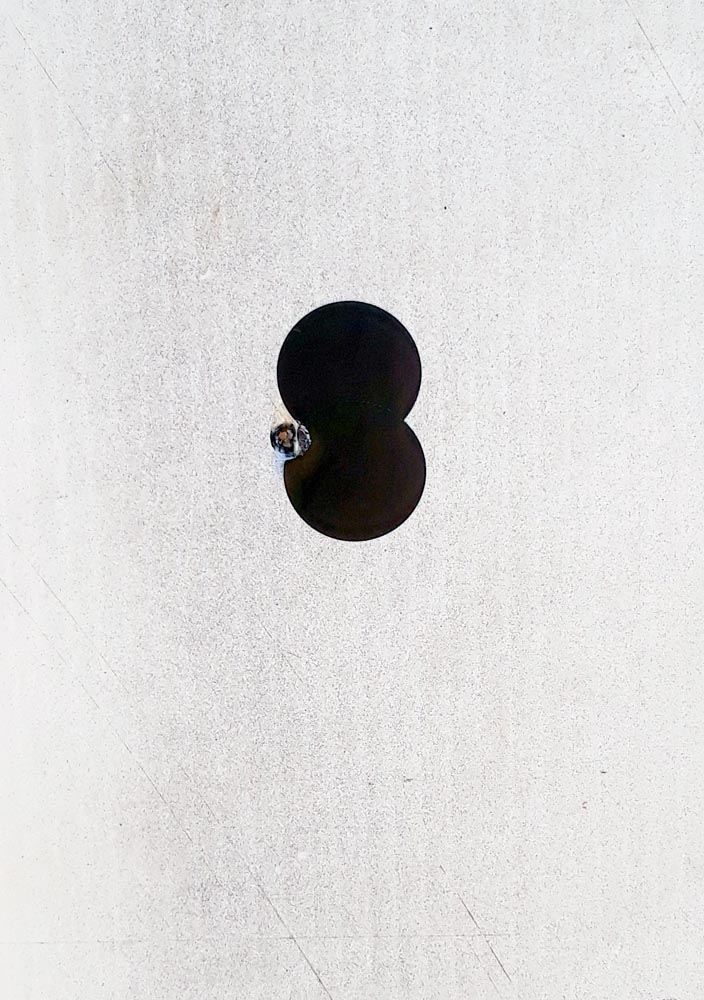
Assuming you used method C, fire another round at the aiming mark. You should be on target. My third shot was not as far right as I expected, which indicates maybe I moved the rifle while adjusting the scope. But I’d only expect this rifle to shoot a 1 MOA group which at 100m is about 29mm so the shot was within that expected group size and close enough.
At this point many people make the mistake of firing more rounds, one at a time and making corrections after each shot. If you do want to go further then statistical analysis indicates you’ll need to shoot at least a 10-shot group then mathematically calculate the centre of the group and make corrections.
Step 7
The range I was using gave me the option of shooting out to 200m. Using my ballistics computer program I’d checked the expected projectile drop between 100m and 200m for the ammunition I was using. It was predicted to be 2.1 MOA so I dialled 2 MOA into the scope, reset the parallax and fired a round at a 200m target. The result was pleasing and in less than 20 minutes with four rounds of ammunition I had a good solid zero at 100m and 200m.